Scheduling Data Delivery
You can configure HOBOlink to automatically deliver exported data files to an email address or FTP/SFTP site on a schedule that you specify. Before you can set up data delivery, you must first select the device and sensor data you want to include in the export as described in Exporting Data. Note: Data delivery is only available for exports that are configured with a time frame of "over the past."
To set up a new scheduled delivery:
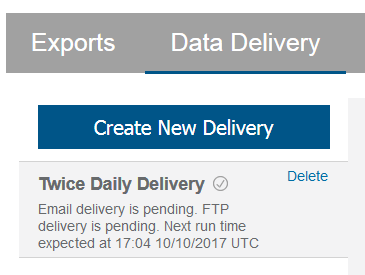
- Click Data and select Data Delivery.
- Click Create New Delivery.
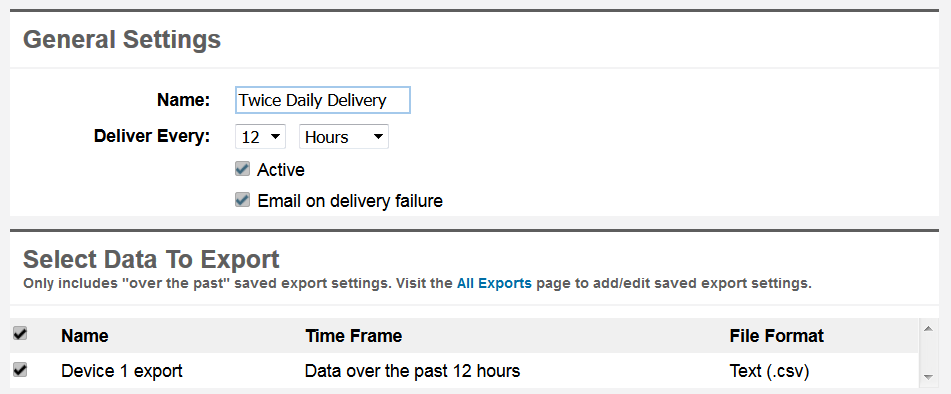
- Under General Settings, type a name for the new delivery schedule.
- Select how often you want the exported file to be delivered (every "x" minutes, hours, days, or weeks).
- Make sure that the Active checkbox is selected. If the box is not selected, then the data will not be delivered.
- Select the "Email on delivery failure" checkbox if you want to be notified when the exported file is unable to be delivered.
- Under Select Data to Export, select the checkbox(es) next to the data you wish to export or click the checkbox in the column header row to quickly select all exports listed. If there are no options in this list, make sure you have selected the device and sensor data to include in an export as described in Exporting Data. Note that only ongoing exports (those configured to occur over the past "x" number of days, hours, or minutes) will display in this list. If you have set up an export to occur before or after a specific date or between two dates, then the export will not display in the list.
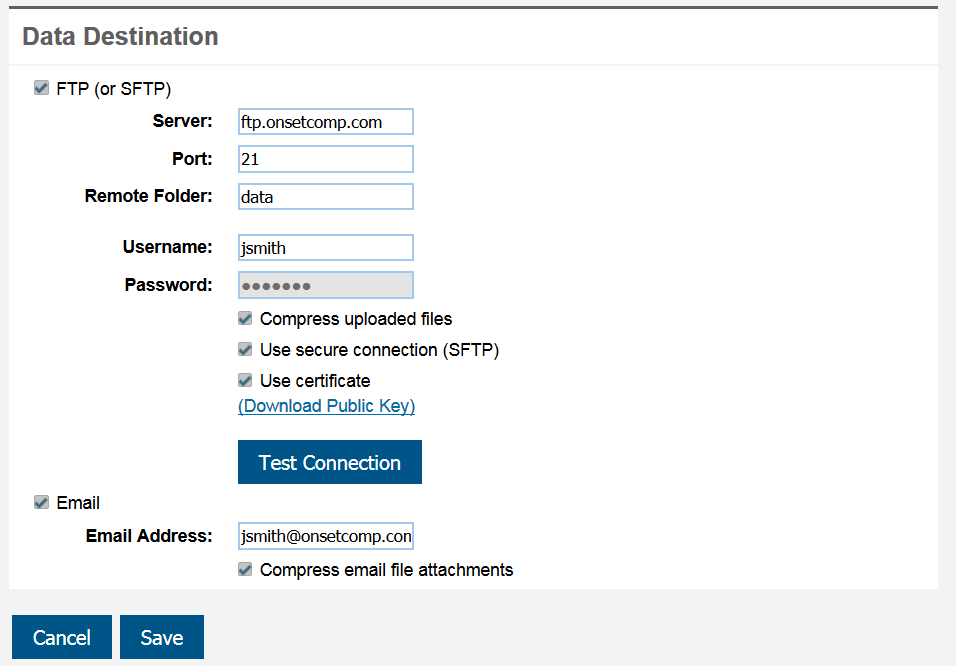
- Under Data Destination, select the FTP (or SFTP) checkbox if you want the exported data file to be delivered to an FTP/SFTP address. Enter the following information for the server where you want exported files to be delivered:
- Server. Type the name of the server (e.g. ftp.companyname.com).
- Port. Type the port number used for the server or leave the field blank if the server uses the default port.
- Remote Folder. Type the name of the folder on the server where you want the exported files to be delivered. Folders beginning with a slash (/) are expected to be root directory paths. Folders without a slash are assumed to be relative to your home directory.
- Username. Type the username for the account used to access the server.
- Password. Type the password to access the server.
- Compress uploaded files. Select this option if you want to compress the file before delivering it to the server.
Use secure connection. Select this option if the server is secure (SFTP). If this option is selected, then click the Use certificate checkbox if the server uses a digital certificate for authentication. See SFTP Certificate Setup for more details.
- Use passive mode. Select this option if the server runs in passive mode (necessary if the server is running behind a firewall). This option is not available if you have selected the Use secure connection checkbox.
Click Test Connection to make sure HOBOlink can connect to the server using the settings entered.
- Select the Email checkbox if you want the exported data file to be sent to an email address. Change the default email address listed if necessary. Select the "Compress email file attachments" checkbox if you want the export file size to be as small as possible.
- Click Save when done. The new scheduled delivery will be listed with a status that the email or FTP/SFTP delivery is pending and the next run time for the export. If you have configured the file to be delivered via email, the email message indicates the time period included in the file. The first delivered file will contain data from the time frame selected in the export settings. Subsequent files will contain all data logged since the last file delivery.
- To make changes to a scheduled delivery, select the delivery from the list, enter the changes, and click Save.
- To create a new delivery based on an existing delivery, select the delivery from the list and click Save As. Type in the new delivery name and then make any other changes and click Save.
- To delete a scheduled delivery, click Delete next to the delivery you want to remove.
- To activate or deactivate a scheduled delivery, select the delivery from the list and click the Active checkbox. Click Save.
- If there is a problem with the delivery, that export will be flagged in this list of scheduled deliveries. Select the delivery and revise any settings as necessary.
-
If an export contains more than one million data points, it is divided into multiple files, each with a maximum of a million data points. If you selected "Compress uploaded files" or "Compress email file attachments," the files are compressed into a .zip file. Otherwise each file is uploaded or emailed individually. If multiple files cannot fit in a single email message, then multiple emails will be sent. In addition, if a file is too large to send as an attachment, the email delivery will fail.
- If the data in the file is a different time period than the device, check the time zone selected in the export settings to make sure it is the same one as the device.
-
For U30 stations only, data delivery is only recommended for devices with logging intervals of 1 minute or greater. This is because data is temporarily stored or "binned" at 1-minute intervals before being saved to the HOBOlink database, where it is then retrieved for exports and data delivery as needed.
-
If using data delivery with MX logger deployments, files may contain all events recorded instead of just the latest events. In addition, you may receive files with no data if the data was not uploaded from HOBOconnect to HOBOlink as expected.